Clock Set-Up Guide
Magic Motion and Musical Motion Clocks
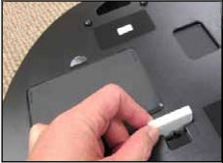
Some clocks come with a foam piece in the back to stabilize the pendulum during shipping. Please remove it to free the pendulum.
PLEASE NOTE: The batteries are separate from the clock inside the display box. Check all packaging material for these items before you dispose of the packing material.

Make sure to insert all batteries properly
into the battery holder, usually located
on the back or bottom of the clock.
Make sure all batteries are correctly installed,
facing the same direction.
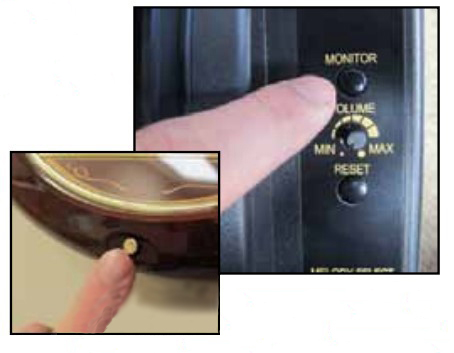
Make sure the clock functions
properly by pressing the MONITOR
button, which is usually located on
the side, the front, or the bottom of
the clock, to make sure the clock
plays the melodies and performs
the Magic Motion.
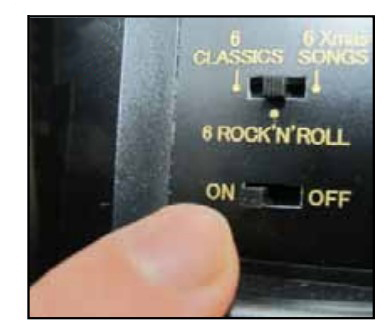
Always make sure that the ON/OFF switch
is on the ON position and the Volume
Control is set at the proper level (usually
maximum).
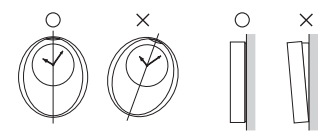
- Make sure to hang the clock very firmly to the wall. Please use a hanging hook or screw which, must be suitable for the specific type of wall material to be firmly secured into the wall. (Hanging the clock information PDF)
- When hanging the clock, make sure to double-check that it is securely hooked in place.
- Make sure the clock is hanging straight and not tilted out from the wall.
Do not use or hang the clock in the following places for it to work correctly and to prevent damage:
- In an area with too high temperature or humidity,
- In an area with extremely low temperatures.
- Nearby strong vibration.
- Near a strong magnetic field.
- In an area that has a lot of dust.
- Most of our clocks are equipped with a light sensor. It detects the light and makes the function of the melody and motion. If the sensor does not see enough light, it will automatically shut off the melody and motion. This feature is so the clock will not play at night. Since the light sensor operates by the brightness of the room where it is placed, try moving the clock to a very bright location. Then while holding the clock vertically as if it was on the wall, press the monitor button.
- If you have any problems with your clock, please visit our Technical Support for more FAQs.
- Everything should be set. You are ready to enjoy your RHYTHM Magic or Musical Motion Clock. Feel free to demonstrate your clock for family and friends anytime by pressing the MONITOR button.
Table Clocks

Some clocks come with a foam piece in the back to stabilize the pendulum during shipping. Please remove it to free the pendulum.
PLEASE NOTE: The batteries are separate from the clock inside the display box. Check all packaging material for these items before you dispose of the packing material.

Make sure to insert all batteries properly
into the battery holder, usually located
on the back or bottom of the clock.
Make sure all batteries are correctly installed,
facing the same direction.
Some will have battery holders in two locations.
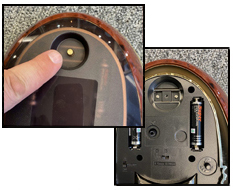
On some of the table clocks, you will have to remove the back panel to get to the battery holder. Look for any knob that you can unscrew to access the back panel. Behind this panel is where you will find the buttons to set the time, change melodies selection, volume control, and ON/OFF switch.

Make sure the clock functions
properly by pressing the MONITOR
button, which is usually located on
the side, the front, or the bottom of
the clock, to make sure the clock
plays the melodies and performs.

Always make sure that the ON/OFF switch
is on the ON position and the Volume
Control is set at the proper level (usually
maximum).
- Most of our clocks are equipped with a light sensor. It detects the light and makes the function of the melody and motion. If the sensor does not see enough light, it will automatically shut off the melody and motion. This feature is so the clock will not play at night. Since the light sensor operates by the brightness of the room where it is placed, try moving the clock to a very bright location. Then while holding the clock vertically as if it was on the wall, press the monitor button.
- If you have any problems with your clock, please visit our Technical Support for more FAQs.
- Everything should be set. You are ready to enjoy your RHYTHM Magic or Musical Motion Clock. Feel free to demonstrate your clock for family and friends anytime by pressing the MONITOR button.
Wooden Wall Clocks
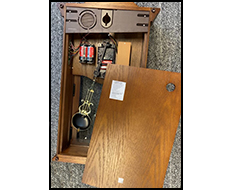
Remove the back panel to access the battery holders, install the pendulum and, set the time.
PLEASE NOTE: The pendulum and batteries are separate from the clock inside the display box. Check all packaging material for these items before you dispose of the packing material.

Make sure to insert all batteries properly
into the battery holder, usually located
on the back or bottom of the clock.
Make sure all batteries are correctly installed,
facing the same direction.
Some will have battery holders in two locations.
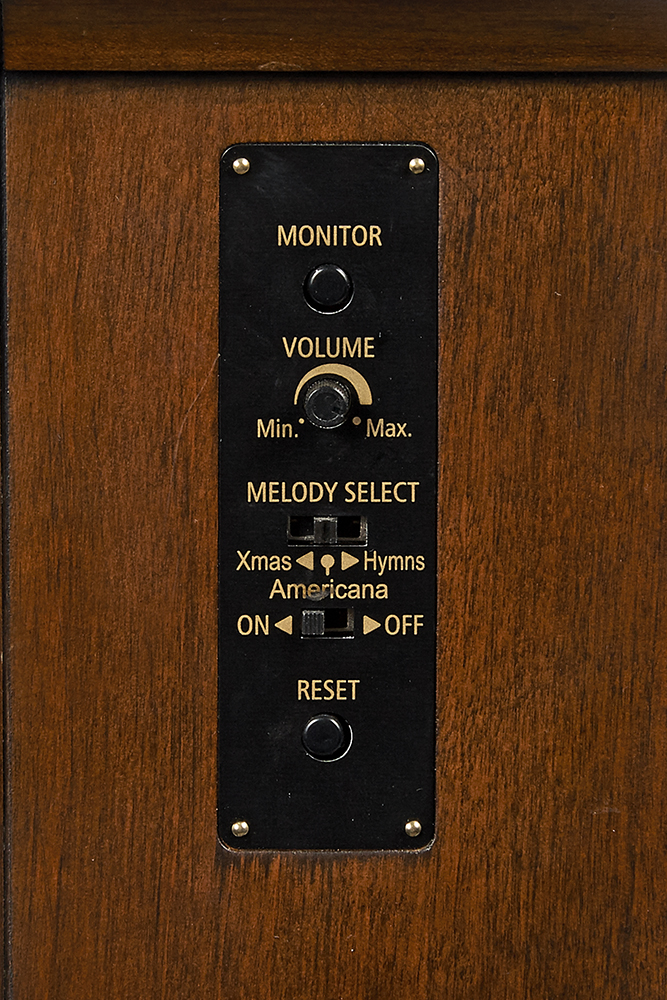
Make sure the clock functions
properly by pressing the MONITOR
button, which is usually located on
the side, the front, or the bottom of
the clock, to make sure the clock
plays the melodies and performs.

Always make sure that the ON/OFF switch
is on the ON position and the Volume
Control is set at the proper level (usually
maximum).

- Make sure to hang the clock very firmly to the wall. Please use a hanging hook or screw which, must be suitable for the specific type of wall material to be firmly secured into the wall. (Hanging the clock information PDF)
- When hanging the clock, make sure to double-check that it is securely hooked in place.
- Make sure the clock is hanging straight and not tilted out from the wall.
Do not use or hang the clock in the following places for it to work correctly and to prevent damage:
- In an area with too high temperature or humidity,
- In an area with extremely low temperatures.
- Nearby strong vibration.
- Near a strong magnetic field.
- In an area that has a lot of dust.
- Every should be set. Your ready to enjoy your RHYTHM Musical Wooden Clock.
- Fell free to demonstrate you clock for family and friends anytime by pressing the MONITOR button.
- If you are have any problems with you clock please visit our Technical Support for more FAQs.
